Installing outdoor wall lighting can enhance both the aesthetics and functionality of your home exterior. Whether for added security, improved visibility, or enhancing the ambiance, proper installation ensures optimal performance and longevity of your fixtures. This guide provides step-by-step instructions on how to safely and effectively install outdoor wall lighting. From selecting suitable fixtures that complement your home’s style to ensuring all electrical connections are secure and weatherproof, each step is crucial. Understanding the placement of power sources, preparing the wall surface, and carefully mounting the fixture are essential considerations. Throughout the process, attention to detail and adherence to safety measures ensure a successful installation. By following these guidelines, you can illuminate your outdoor spaces efficiently while adding value and curb appeal to your property.
1. Planning: Choose location and lighting type.
When planning to install outdoor wall lighting, the first step is choosing the optimal location and type of lighting. Consider the specific areas around your home that require illumination for safety, security, or aesthetic purposes. Assess whether you need ambient lighting to enhance overall visibility, or focused lighting to highlight specific architectural features or pathways. Factors such as the direction of light, intensity needed, and the overall design of your outdoor space should guide your decision. Additionally, take into account the style and material of the light fixture that complements your home’s exterior decor. This initial planning phase ensures that your outdoor lighting installation meets both functional needs and enhances the beauty of your outdoor environment effectively.
2. Materials: Gather tools, lights, and equipment.
To begin installing outdoor wall lighting, gather all necessary materials and tools. Start with the basics: ensure you have the chosen light fixtures, suitable for outdoor use and compatible with your wiring setup. Prepare essential tools such as a screwdriver, pliers, wire cutters, and a voltage tester to safely handle electrical connections. Depending on your installation method, you may need a ladder or scaffolding to reach higher points securely. Additionally, install outdoor wall lighting gather protective gear like gloves and safety glasses to safeguard against any potential hazards. Double-check that you have all required mounting hardware, including screws and anchors suited to your wall type. Having everything ready beforehand ensures a smooth installation process and minimizes interruptions, allowing you to focus on completing the project efficiently and safely.
3. Safety: Turn off power and check.
Safety is paramount when installing outdoor wall lighting. Before starting any work, ensure to turn off the power at the circuit breaker to prevent any electrical hazards. Use a voltage tester to double-check that the power is indeed off before proceeding with the installation. This step is crucial as it protects you from accidental electric shocks. Additionally, wearing appropriate personal protective equipment (PPE), install outdoor wall lighting such as gloves and safety goggles, can further minimize risks during the installation process. Always follow the manufacturer’s instructions and local electrical codes to maintain safety standards. Taking these precautions not only safeguards your well-being but also ensures a smooth and secure installation of your outdoor lighting fixtures.
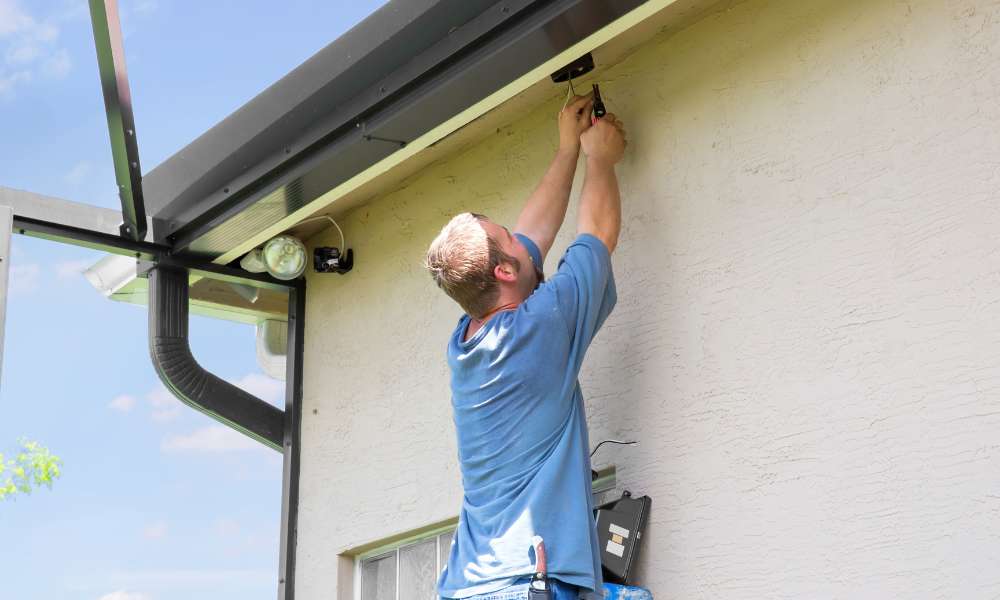
4. Mounting: Mark and drill mounting holes.
When mounting garden wall lighting, the first step is crucial: marking and drilling the mounting holes. Begin by positioning the fixture against the wall in the desired location. Use a pencil to mark where the mounting holes will go based on the fixture’s mounting bracket or backplate. Ensure the fixture is level before marking to avoid misalignment later. Next, select an appropriate drill bit size for the mounting screws and carefully drill into each marked spot. Take care not to drill too deeply, especially if the wall is made of delicate material like stucco or brick. Once holes are drilled, insert anchors if necessary, and then you’re ready to proceed with attaching the mounting hardware securely to the wall, ensuring a stable foundation for your outdoor lighting fixture.
5. Wiring: Connect wires to power source.
When wiring outdoor wall lighting, it’s crucial to connect the wires properly to the power source for safe and effective operation. Begin by turning off the power at the circuit breaker to avoid any electrical hazards. Strip the insulation from the end of each wire carefully, ensuring about half an inch is exposed. Match the wires from the lighting fixture to those from the power source based on color codes—typically, black to black (live), install outdoor wall lighting white to white (neutral), and green or bare copper to the ground wire. Use wire connectors to secure these connections tightly and ensure there are no exposed wires. Once connected, gently tug on each wire to confirm they are secure. Finally, carefully tuck the wires into the electrical box and proceed with mounting and testing the light fixture.
6. Mounting Fixture: Secure light to wall.
To securely mount the outdoor light fixture to the wall, start by aligning the fixture’s mounting plate with the holes or marks made during the preparation stage. Use screws appropriate for outdoor use and ensure they are tightened securely to anchor the fixture firmly in place. Check that the fixture is level using a spirit level to maintain aesthetic appeal and proper functionality. Depending on the fixture design, you may need to attach additional components such as decorative covers or weatherproof seals to protect against moisture and debris. Once the fixture is securely mounted, double-check all connections and ensure there are no exposed wires. This step is crucial for safety and to ensure the longevity of your outdoor lighting installation.”
7. Sealing: Ensure waterproof and weatherproof installation.
When sealing garden wall lighting installations, it’s crucial to prioritize waterproofing and weatherproofing to ensure longevity and safety. Begin by using silicone caulk around any openings where wires enter the fixture or wall, ensuring a tight seal that prevents water ingress. Choose a caulk specifically designed for outdoor use to withstand varying weather conditions. Additionally, apply a layer of outdoor-rated sealant tape or putty to further protect electrical connections from moisture. Before finalizing the installation, conduct a thorough inspection to confirm all seals are intact and secure. This meticulous approach not only safeguards against water damage but also enhances the durability of your outdoor lighting setup, ensuring it remains functional and safe in all weather conditions.
8. Testing: Turn on power and test.
After completing the installation of your garden wall lighting, the crucial next step is testing the setup. Before proceeding, ensure all connections are secure and the fixture is properly mounted. Turn on the power to the lighting circuit and observe the fixture. Check for proper illumination and ensure that all parts are functioning correctly, including any motion sensors or timers if applicable. Verify that there are no flickers or unusual noises coming from the fixture. It’s also wise to test the functionality from different angles and distances to confirm adequate coverage and brightness according to your needs. If any issues arise during testing, double-check the wiring connections and consult the manufacturer’s instructions for troubleshooting tips. Once satisfied with the performance, proceed with securing any loose ends and cleaning up the work area.
9. Adjusting: Position light for optimal illumination.
When adjusting garden wall lighting, it’s crucial to position the light for optimal illumination. Start by ensuring the fixture is securely attached and aligned according to your desired lighting coverage. Consider factors like the angle of illumination and the area you want to highlight or secure. Test the light’s positioning during different times of the day to gauge its effectiveness in providing both aesthetic appeal and functional lighting. Make minor adjustments as necessary to achieve balanced lighting without causing glare or shadowing effects. This step is essential not only for enhancing the ambiance of your outdoor space but also for ensuring adequate visibility and security during nighttime hours. Taking time to fine-tune the light’s position can significantly enhance its overall effectiveness and longevity.
10. Finalising: Tighten screws and secure fixtures.
Finalizing the installation process involves meticulous attention to detail to ensure longevity and safety. Begin by tightening all screws and bolts securely to firmly anchor the fixture in place. This step not only enhances the fixture’s stability but also prevents any potential movement caused by weather conditions or other external factors. Double-check that the fixture is aligned correctly according to your initial markings and adjustments. Verify that all connections are snug and insulated to protect against moisture and corrosion. Conduct a thorough inspection of the surrounding area for any loose debris or excess materials, ensuring a clean finish. By following these steps, you’ll not only achieve a professional-looking installation but also ensure that your garden wall lighting fixture is securely positioned for reliable performance over time.
11. Clean Up: Dispose of packaging properly.
After completing the installation of your outdoor wall lighting, it’s essential to ensure a tidy cleanup process, which includes properly disposing of all packaging materials. Dispose of cardboard boxes, plastic wrappings, and any other packaging responsibly by recycling them wherever possible. This not only helps keep your surroundings clean but also minimizes environmental impact. Double-check the area around the installation site to ensure no small debris or leftover parts are left behind. By taking these steps, you contribute to maintaining a safe and neat environment while enjoying the benefits of your newly installed outdoor lighting.
12. Maintenance: Regularly check and clean lights.
Regular maintenance is crucial to ensure the longevity and optimal performance of garden wall lighting fixtures. It’s important to regularly inspect and clean the lights to prevent dirt, debris, or insects from affecting their functionality. Start by turning off the power supply to the lights for safety. Gently wipe down the fixtures with a soft cloth and mild soapy water to remove any accumulated dust or grime. Avoid using abrasive cleaners or harsh chemicals that could damage the finish or electrical components. Additionally, check for any signs of wear, loose connections, or corrosion, and address these issues promptly to prevent further damage. By conducting these simple maintenance tasks regularly, you can extend the lifespan of your outdoor wall lighting and ensure they continue to illuminate your space effectively.