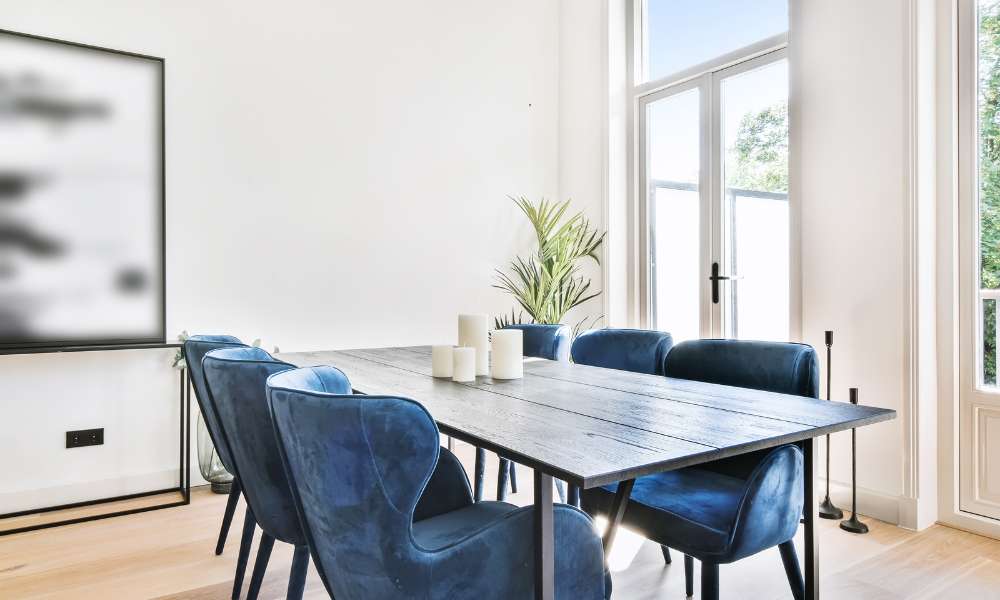
Refreshing your dining table with a fresh coat of paint can breathe new life into your dining area. Whether you’re looking to update the style, match a new color scheme, or simply give an old table a new lease on life, painting is a cost-effective and creative way to achieve your goals. Not only does it allow you to personalize your furniture to reflect your unique taste, but it also extends the lifespan of the table by protecting its surface. In this guide, we will walk you through the entire process of painting a dining table, from gathering materials to applying the final touches, ensuring professional and long-lasting results.
1. Materials and Tools Needed
To paint a dining table effectively, having the right materials and tools is essential. You will need high-quality paint and primer specifically designed for furniture, as these provide the best adhesion and durability. Select a brush or roller that suits the type of paint you are using; a brush offers more precision for detailed areas, while a roller is ideal for large, flat surfaces. Sandpaper with varying grits (80, 120, and 220) is crucial for preparing the surface and achieving a smooth finish.
Additionally, drop cloths or newspapers are necessary to protect your workspace from paint splatters. Painter’s tape will help create clean edges, and a paint tray will hold your paint conveniently. For those looking to add special finishes, consider optional materials like glaze for antiquing, stencils for patterns, or a clear sealant for extra protection. Having these materials and tools on hand will ensure a seamless and professional painting experience.
2. Choosing the Right Paint and Primer
Selecting the appropriate paint and primer is crucial for a successful dining table makeover. For furniture, chalk paint and latex paint are popular choices due to their durability and ease of use. Chalk paint offers a matte, vintage look and requires minimal prep work, while latex paint provides a smooth, washable finish. The primer is equally important as it ensures the paint adheres properly and lasts longer. When choosing a primer, opt for one that matches the type of paint you’re using water-based primer for latex paint and oil-based primer for oil paint. A good primer not only helps the paint stick better but also hides any imperfections and stains on the table’s surface. This combination of the right paint and primer will give your dining table a beautiful, long-lasting finish.
3. Preparing the Dining Table
Proper preparation of the dining table is essential to ensure a smooth and durable paint finish. Start by cleaning the table thoroughly with a mild detergent and water to remove any dust, grease, or grime. This step is crucial because any residue left on the surface can prevent the paint from adhering properly. Once the table is clean, it’s time to remove the old paint or finish. Use a paint stripper or sandpaper to strip away the existing finish, working in sections to ensure even removal.
For heavily coated surfaces, a power sander can save time and effort. Make sure to sand the table down to a smooth surface, paying extra attention to any intricate details or carvings. Removing the old finish not only helps the new paint adhere better but also provides a clean slate for your creative efforts. This thorough preparation will lay the foundation for a beautifully painted dining table.
4. Sanding the Surface
Sanding is a critical step in preparing your dining table for painting, ensuring a smooth and even finish. Start with coarse-grit sandpaper, such as 80-grit, to remove any remaining old paint or varnish and smooth out imperfections. Then, switch to medium-grit sandpaper, like 120-grit, to refine the surface further. Finally, use fine-grit sandpaper, around 220-grit, to achieve a silky-smooth finish, perfect for paint application. When sanding flat surfaces, use a sanding block or an orbital sander for consistent pressure and even results. For intricate details or curved areas, fold the sandpaper to fit the contours and sand by hand to maintain the shape. Always sand in the direction of the wood grain to avoid scratches. This careful sanding process will ensure your dining table has a flawless surface ready for priming and painting.
5. Applying Primer
Applying primer is a vital step to ensure your paint adheres well and lasts long. Begin by stirring the primer thoroughly to achieve a uniform consistency. Using a high-quality brush or roller, apply a thin, even coat of primer to the entire surface of the dining table, working in the direction of the wood grain. Pay special attention to edges and corners to ensure full coverage. Allow the primer to dry completely, typically for at least 24 hours, depending on the manufacturer’s instructions and environmental conditions. For best results, lightly sand the primed surface with fine-grit sandpaper (220-grit) to smooth out any brush strokes or imperfections. Wipe away dust with a tack cloth before applying the second coat of primer if necessary. Proper priming prepares the table for a flawless, professional paint finish.
6. Painting Techniques
Choosing the right painting technique is key to achieving a professional finish on your dining table. Brushes offer precision and are excellent for detailed work and edges, while rollers cover large, flat areas quickly and evenly. Spray paint provides a smooth, even coat without brush marks but requires careful masking and ventilation. To achieve a smooth finish, apply paint in thin, even coats, allowing each coat to dry completely before applying the next. Read, black dining room table ideas. Sand lightly with fine-grit sandpaper between coats to eliminate any imperfections and ensure a sleek surface. Keep a wet edge while painting to avoid lap marks, and always paint in the direction of the wood grain. These techniques will help you achieve a flawless, durable finish that enhances the beauty of your dining table.
7. Applying the Paint
Applying the paint correctly ensures a stunning finish for your dining table. Start by stirring the paint thoroughly to achieve an even consistency. Using a high-quality brush or roller, apply the first thin coat of paint, working in the direction of the wood grain for a smooth finish. Allow the first coat to dry completely, typically 4-6 hours, or as recommended by the manufacturer. Lightly sand the surface with fine-grit sandpaper (220-grit) between coats to remove any imperfections. Wipe away any dust with a tack cloth before applying the next coat. Repeat this process for at least two to three coats to achieve full coverage and a durable finish. Ensure each coat is fully dry before adding the next. This methodical approach will result in a beautifully painted eating table with a professional appearance.
8. Finishing Touches
Adding finishing touches to your dining table can elevate its aesthetic and personalize the piece. For a distressed look, gently sand the edges and surfaces with fine-grit sandpaper to reveal the wood or base coat beneath. You can also use techniques like dry brushing or sponging to add texture and depth. Decorative elements, such as stencils or decals, can create unique patterns and designs. Once you’ve achieved the desired look, it’s crucial to seal the paint for durability. Apply a clear topcoat, such as polyurethane or polycrylic, using a high-quality brush. This not only protects the tint from wear and tear but also enhances the table’s finish. Allow the sealer to dry completely between coats, applying at least two to three layers for maximum protection. These finishing touches will ensure your eating table looks stunning and lasts for years.
9. Cleaning Up
Proper cleanup after painting your dining table is essential for safety and longevity of your tools. Start by disposing of any used tint materials, such as empty cans and used sandpaper, in accordance with local hazardous waste disposal regulations. This prevents harmful chemicals from contaminating the environment. For cleaning brushes and rollers, use the appropriate solvent—water for water-based paints and mineral spirits for oil-based paints. Rinse brushes thoroughly until the water or solvent runs clear, then reshape the bristles and hang them to dry. Clean paint trays and other tools promptly to prevent the tint from hardening. By properly disposing of tint materials and cleaning your tools, you ensure a safe environment and maintain your equipment for future projects. This meticulous approach to cleanup will keep your workspace organized and ready for the next creative endeavor.
10. Caring for the Newly Painted Table
Proper care of your newly painted dining table ensures it stays fresh and vibrant. Regularly dust the table with a soft, dry cloth to prevent the buildup of dirt and grime. Avoid placing hot items directly on the surface; use coasters and placemats to protect against heat and spills. Clean any spills promptly with a damp cloth and mild soap, avoiding harsh chemicals that can damage the finish. For touch-ups, keep a small amount of the original tint in a sealed container. Lightly sand the area to be retouched, clean it thoroughly, and apply a thin coat of paint, blending it with the surrounding area. Allow it to dry completely and, if necessary, reapply the clear topcoat. Following these maintenance tips will keep your table looking beautiful and ensure its longevity.
Conclusion
Painting a dining table is a rewarding project that can transform your space and breathe new life into your furniture. By carefully selecting the right materials, preparing the surface properly, and applying tint with precision, you can achieve a professional and durable finish. Adding personal touches and sealing the tint will further enhance the table’s appearance and longevity. Remember to clean up thoroughly and care for your newly painted table to maintain its fresh look. With these steps, your eating table will become a beautiful centerpiece that reflects your style and creativity, ensuring enjoyment for years to come. Whether you’re updating an old table or customizing a new one, this guide provides everything you need for a successful painting project.

