Installing a kitchen faucet may seem like a daunting task, but with the right tools and instructions, it can be a relatively easy project. The first step is to gather the necessary tools and materials. This includes the faucet itself, a basin wrench, Teflon tape, an adjustable wrench, and a screwdriver.
The next step is to remove the old faucet. To do this, use the basin wrench to loosen the nuts that secure it to the sink. Once they are loose, use the adjustable wrench to finish removing them. Be sure to keep track of where each nut goes so that it can be re-used when installing the new faucet. Next, disconnect the water supply lines by unscrewing them from the faucet. Finally, remove the old faucet by pulling it straight up off of the sink.
Why call the kitchen?
Installing a kitchen faucet may seem like a daunting task, but with the right tools and instructions, it can be a relatively easy project. Here is how to install a kitchen faucet:
1. Turn off the water supply to the sink by turning off the main water valve.
2. Disconnect the old faucet by unscrewing the nuts that hold it in place.
3. Clean the area around the sink hole and remove any debris or caulking that may be in the way.
4. Insert the faucet’s mounting plate into the hole and secure it in place with screws.
5. Connect the water lines to the new faucet and tighten the connections with pliers.
6. Turn on the water supply and check for leaks.
The purpose of a kitchen faucet
Kitchen faucets are one of the most important features in a kitchen. They provide water for cleaning dishes, hands, and food. They also provide a place for people to rinse off fruits and vegetables. Installing a kitchen faucet is not difficult, but there are a few things that you should know before you start.
The first thing that you need to do is measure the distance from the hole in the sink to the center of the faucet. This will help you determine which type of faucet to buy. Once you have chosen the right faucet, remove the old one by turning it counterclockwise. If there is any caulk around the sink, use a razor blade to cut it away.
Once the old faucet is removed, clean the area around the sink with soap and water.
How to choose a kitchen faucet
1. Kitchen faucets come in a variety of shapes and sizes, so it can be difficult to know which one to choose for your home.
2. Before you make your decision, consider the type of sink you have and how much water pressure you need.
3. There are also different finishes to choose from, so think about the style of your kitchen and pick a faucet that will match.
4. Once you’ve narrowed down your options, take into account the price and decide which one is best for your budget.
5. Finally, don’t forget to read the installation instructions carefully before you start installing your new faucet!
You will need tools and materials
The first step in installing a kitchen faucet is to gather the tools and materials you will need. This includes a Phillips head screwdriver, a basin wrench, plumber’s putty, Teflon tape, and a new kitchen faucet.
Once you have gathered your tools and materials, the next step is to remove the old kitchen faucet. Begin by loosening the screws on the faucet with the Phillips head screwdriver. Once the screws are loose, use the basin wrench to loosen and remove the nuts holding the faucet. Be careful not to damage the sink with the wrench.
Next, use a plumber’s putty to seal around the base of the new kitchen faucet. Then use Teflon tape to wrap around the threads of the faucet’s supply lines.
Turn off the water supply
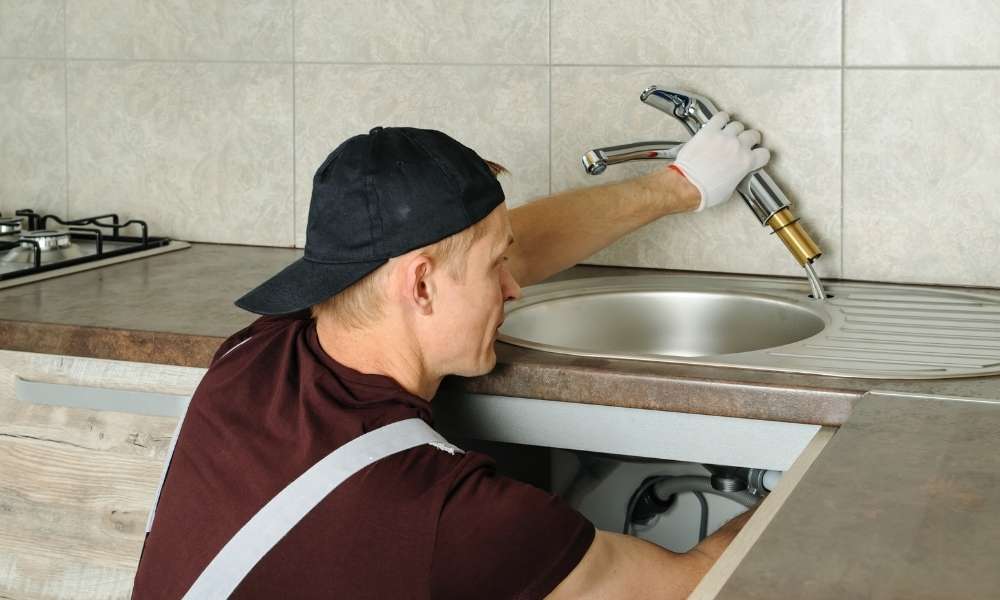
Installing a kitchen faucet is a simple process that can be completed in less than an hour. The first step is to turn off the water supply. The water supply is typically located underneath the kitchen sink. There will be a valve that you need to turn off in order to stop the flow of water. Once the water is turned off, you can remove the old faucet by unscrewing it from the sink.
Be sure to collect all of the screws and washers so that you can reuse them with the new faucet. The next step is to install the new faucet. Start by attaching the mounting bracket to the sink with the screws provided. Next, attach the faucet hose to the mounting bracket and tighten it with a wrench. Finally, screw on the faucet head and washers. Turn on the water supply and test for leaks.
Remove old call
Replacing a kitchen faucet is a do-it-yourself job that can be completed in about an hour. The first step is to remove the old faucet. This is usually done by turning off the water supply, unscrewing the nuts that hold the faucet in place, and pulling it out of the sink. The new faucet should then be inserted in reverse order. Be sure to tighten the nuts securely to prevent leaks. Finally, turn on the water supply and check for any leaks.
How To Remove An Old Kitchen Faucet
1. Removing an old kitchen faucet is a simple process that can be completed in just a few minutes.
2. Begin by shutting off the water supply to the faucet. This can be done by turning off the valve under the sink.
3. Next, use a wrench to loosen the nuts that secure the faucet to the sink.
4. Once the nuts are loosened, pull the faucet up and out of the sink.
5. Be sure to dispose of the old faucet properly and safely.
6. Now it’s time to install your new kitchen faucet.
7. Begin by placing the faucet in position and securing it to the sink with the nuts provided.
Install new call
Installing a new kitchen faucet may seem daunting, but with the proper tools and instructions, it can be a relatively easy task. The first step is to remove the old faucet. This may require turning off the water supply and disconnecting the hoses. Next, measure the hole in your sink to ensure that you purchase a faucet that will fit.
Once you have chosen a faucet, follow the manufacturer’s instructions for installation. Oftentimes, this will involve using Teflon tape to seal the threads on the faucet and sink. Be sure to tighten all screws securely and turn on the water supply to test for leaks. If everything checks out, enjoy your new kitchen faucet!
How to install a new kitchen faucet
Installing a kitchen faucet may seem like a daunting task, but it’s actually a very simple process. The most important thing to remember is to take your time and be careful. Here are the steps you need to take to install a new kitchen faucet:
1. Shut off the water supply to the sink. There is usually a valve located underneath the sink that you can turn off.
2. Disconnect the old faucet from the sink. This can usually be done by unscrewing it from the sink itself or by disconnecting any hoses that are attached to it.
3. Install the new faucet in its place. Ensure that it is properly aligned and that all the screws are tightened securely.
Turn on the water supply and check for leaks
Installing a kitchen faucet is a relatively easy job that can be completed in less than an hour. The following instructions will show you how to install a new kitchen faucet using the existing water supply and drain lines.
Turn on the water supply and check for leaks. Make sure to turn off the water supply before beginning the installation.
Disconnect the old faucet from the water supply and drain lines. If needed, use a wrench to loosen the fittings.
Thread the new faucet onto the water supply and drain lines. Tighten the fittings with a wrench if needed.
Make sure that all of the connections are tight and then turn on the water supply. Check for leaks and make any necessary adjustments.
Types of kitchen faucets
There are a few different types of kitchen faucets on the market. The three most common are the single-hole, two-handle, and one-handle faucets.
The single-hole faucet is the simplest option. It has one spout and one handle. This type of faucet is best for kitchens with a small sink or limited counter space.
The two-handle kitchen faucet has separate handles for hot and cold water. This type of faucet is ideal for kitchens with multiple sinks or large sinks.
The one-handle kitchen faucet is the most popular type of kitchen faucet. It has one lever that controls both the hot and cold water supply. This type of faucet is perfect for kitchens with limited space or those who want a more minimalist look.
Conclusion
When it comes time to install a kitchen faucet, the process is relatively simple. However, there are a few things to keep in mind. In this article, we will walk you through the installation process and highlight some key things to look out for.
The first step is to remove the old faucet. This can be done by unscrewing the mounting nuts at the base of the faucet. Once the old faucet is removed, you will need to clean up any caulk or sealant that was used to attach it to the sink.
Next, you will need to install the new faucet. This can be done by screwing in the mounting nuts at the base of the faucet. Be sure to use plumber’s tape on the threads of the nuts to ensure a tight seal.