Understanding how to remove A kitchen faucet is A valuable skill for any homeowner enthusiast. Whether you’re upgrading to A new tap, Performing repairs, Or simply conducting routine maintenance, Knowing the proper removal procedure is essential. A sink tap is A central component Of the sink area, And its removal allows access to plumbing connections And facilitates various maintenance tasks. By mastering this process, You gain the confidence to tackle faucet-related issues efficiently And effectively, Saving time And money on professional services. In this guide, We’ll explore the step-by-step process Of removing A kitchen faucet, Covering everything from safety precautions to troubleshooting tips. With A clear understanding Of each stage, You’ll be equipped to handle faucet removal projects with ease, Ensuring smooth transitions And optimal functionality in your kitchen space. Let’s delve into the intricacies Of kitchen spigot removal And empower you to take control Of your plumbing needs.
What tools do I need to remove a kitchen faucet?
To successfully remove A kitchen faucet, You’ll need A few essential tools to facilitate the process effectively. Firstly, An adjustable wrench is indispensable for loosening And disconnecting nuts And bolts securing the nozzle to the sink. This versatile tool allows you to adjust its width to fit various sizes Of fasteners, Providing the necessary leverage to loosen them. Additionally, A basin wrench is invaluable for reaching tight spaces underneath the sink And accessing mounting nuts or bolts that may be difficult to reach with A standard wrench. A screwdriver may also be required to remove any fasteners holding the faucet in place. Finally, The plumber’s tape is essential for sealing threaded connections And preventing leaks once the spout is reinstalled. By ensuring you have these essential tools on hand before beginning the removal process, You’ll be well-equipped to tackle the task efficiently And effectively, Ensuring A Smooth And successful outcome.
What steps should I take to prepare for removing the faucet?
Preparing to remove A spigot is essential for ensuring A smooth And successful process. Start by clearing out the area around the sink to provide ample space for maneuvering And accessing the valve components. Remove any items stored on or around the sink to prevent obstruction And facilitate easy access to the faucet And its connections. Next, Shut Off the water supply valves located beneath the sink to prevent water from flowing into the faucet during the removal process. It’s also advisable to turn off the water heater to avoid potential accidents from hot water discharge. Finally, Take the time to read the manufacturer’s instructions for your cock model, If available, To familiarize yourself with any specific steps or considerations relevant to your particular faucet design. By following these preparation steps diligently, You’ll set yourself up for A successful And efficient removal Of your kitchen faucet.
2. Safety Precautions
Before embarking on the task Of removing A kitchen faucet, It’s paramount to prioritize safety precautions to ensure A trial to prevent any accidental leaks or water damage during the removal process. By turning Off both the hot And cold water valves, You minimize the risk Of encountering unexpected water flow while working on the faucet connections. Additionally, For added safety measures, Consider turning Off the water heater to avoid potential scalding accidents from hot water discharge. Ensuring proper ventilation in the workspace is crucial, Especially It you’ll be using any lubricants or penetrating oils to loosen stubborn connections. Adequate ventilation helps dissipate fumes And prevents the buildup Of potentially hazardous vapors, Creating A safer environment for you to work in. By adhering to these safety precautions, You can proceed with confidence, Knowing that you’ve taken necessary measures to protect yourself And your surroundings during the kitchen spigot removal process.
3. Gathering Necessary Tools And Materials
Before diving into the task Of removing A water dispenser, It’s imperative to gather all the essential tools And materials required for the job. Among the indispensable tools are an adjustable wrench, Basin wrench, Screwdriver, And plumber’s tape. These tools are essential for loosening nuts, Bolts, And screws, As well as ensuring proper sealing Of connections. Additionally, Depending on the specific type Of cock you’re dealing with, There may be optional tools required, Such as A cartridge puller for cartridge faucets or A faucet puller for stubborn spout handles. Furthermore, Having towels or rags on hand is crucial for quickly wiping up any spills or leaks that may occur during the removal process, Helping to maintain A clean And safe workspace. By ensuring you have all the necessary tools And materials prepared beforehand, You’ll be well-equipped to tackle the task Of removing your kitchen faucet efficiently And effectively.
4. Preparation
Preparation is key when it comes to successfully removing A mixer tap, Ensuring A smooth And efficient process from start to finish. Begin by clearing out the area surrounding the sink to provide ample space for maneuvering And accessing the nozzle components. Removing any unnecessary clutter or obstacles allows you to work more comfortably And minimizes the risk Of accidents or damage to nearby items. Additionally, Placing A bucket or container under the sink serves as A proactive measure to catch any water or debris that may be dislodged during the removal process, Preventing mess And facilitating cleanup afterward. Familiarizing yourself with the manufacturer’s recommendations ensures that you approach the removal process with confidence And clarity, Reducing the likelihood Of errors or complications along the way. By prioritizing preparation, You set yourself up for success And pave the way for A seamless water fixer removal experience.
5. Disconnecting Water Supply Lines
Disconnecting the water supply lines is A critical step in the process Of removing A kitchen faucet, Ensuring A safe And efficient procedure. To begin, It’s essential to turn Off both the hot And cold water supply valves located beneath the sink. This prevents water from flowing into the faucet during the removal process, Minimizing the risk Of leaks. Carefully turning the nuts counterclockwise allows you to detach the supply lines without damaging the connections or surrounding components. As you disconnect the water supply lines, It’s advisable to place A bucket or container underneath to catch any residual water that may drain from the lines. This helps prevent water damage to the cabinet or surrounding areas And facilitates cleanup once the removal process is complete. By following these steps, You can safely And effectively disconnect the water supply lines, Setting the stage for the successful removal Of your kitchen faucet.
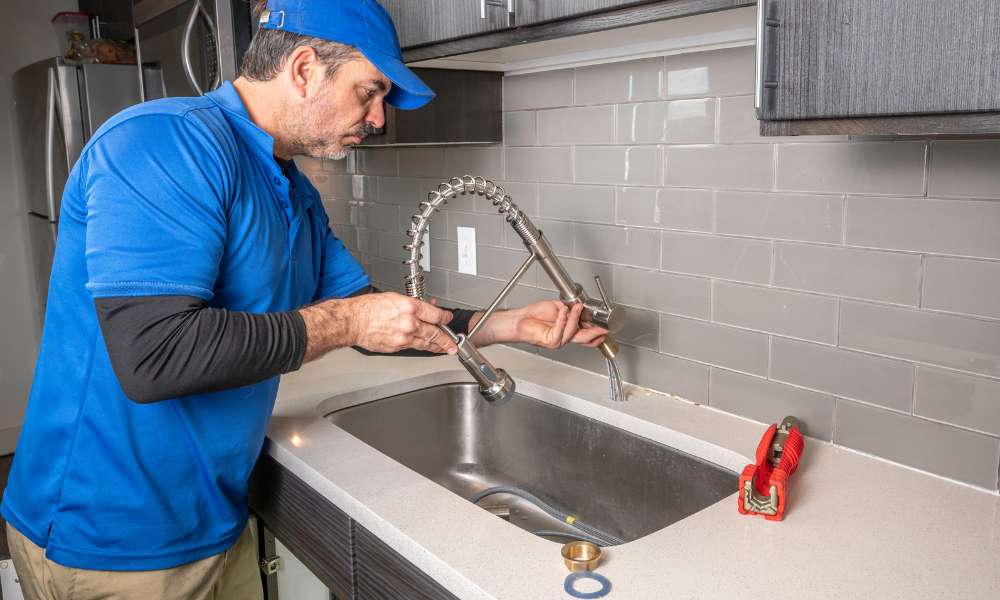
6. Removing The Faucet Mounting Hardware
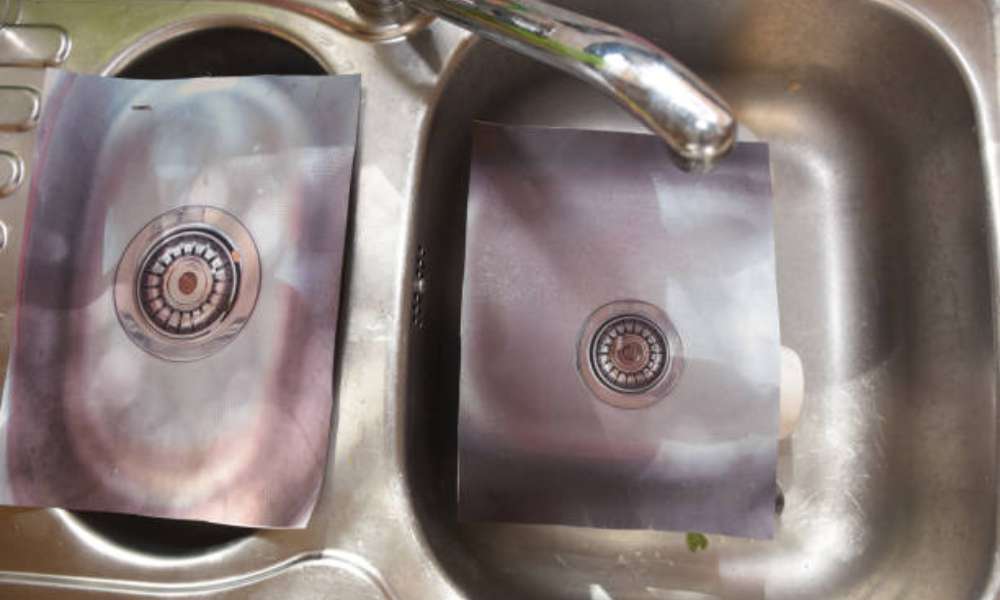
Removing the faucet mounting hardware is A pivotal step in the process Of replacing or repairing A kitchen faucet, Requiring attention to detail And precision. These are typically located beneath the sink, Near the base Of the faucet. Once located, Use an appropriate tool such as A basin wrench to loosen And remove the mounting hardware. The basin wrench provides leverage And access to tight spaces, Facilitating the removal process without causing damage to surrounding surfaces. Once the mounting hardware is fully loosened, Carefully lift the faucet And associated components from the sink, Ensuring A Smooth And controlled removal process. By following these steps meticulously, You can successfully remove the faucet mounting hardware And proceed with your desired faucet replacement or repair tasks. A desire for A modern upgrade, Or A simple change in style, replacing A kitchen faucet can dramatically transform your space.
7. Addressing Stubborn Connections
Addressing stubborn connections during the removal Of A kitchen nozzle requires patience, Resourcefulness, And A systematic approach. When encountering stubborn nuts or bolts that refuse to loosen, remove A kitchen faucet It’s essential to employ troubleshooting methods to overcome the resistance. Start by assessing the situation And identifying potential causes Of stubbornness, Such as rust or corrosion. Next, Apply A penetrating oil or lubricant to the affected connections. Allowing it to seep into the threads And loosen the grip Of the stubborn nuts or bolts. If the stubborn connections persist, Consider using additional leverage or specialized tools designed for stubborn fasteners, Such as A breaker bar or impact wrench. However, Exercise caution to avoid exerting excessive force, Which could cause damage to the faucet or sink. By employing these strategies judiciously And methodically, You can effectively. Address stubborn connections And proceed with the faucet removal process smoothly And efficiently.
How do I disconnect the water supply lines from the faucet?
Disconnecting the water supply lines from the spigot is A crucial step in the process Of removing A kitchen faucet. To begin, Locate the shut-off valves for the hot And cold water supply lines beneath the sink And turn them clockwise to shut Off the water flow. Once the water supply is turned Off, remove A kitchen faucet Use an adjustable. Wrench to loosen And disconnect the water supply lines from the spout connections. Start by placing the wrench around the nut or connector securing the supply line to the faucet. And turning it counterclockwise to loosen the connection. Be prepared for A small amount Of water to drain from the lines once disconnected, So it’s advisable to place A bucket or container beneath to catch any spills.
By following these steps carefully, You can safely And effectively disconnect the water supply lines from your kitchen faucet in preparation for its removal.
Do I need to read the manufacturer’s instructions before removing the faucet?
Yes, It’s highly advisable to read the manufacturer’s instructions before attempting to remove A kitchen faucet. While the process Of removing A valve may seem straightforward. Each cock model can have unique features or installation methods that may require specific steps for removal. The manufacturer’s instructions provide valuable guidance on the correct procedures for disassembling And removing the faucet. Ensuring that you approach the task with clarity And confidence. Additionally, The instructions may include important safety precautions, Such as recommendations for shutting off water valves or handling delicate components. By familiarizing yourself with the manufacturer’s instructions beforehand. You can avoid potential pitfalls or mistakes that could lead to damage or complications during the removal process. Ultimately, Taking the time to review the instructions ensures that you have A clear understanding Of the necessary steps And considerations. Allowing you to proceed with the removal Of your kitchen faucet safely And effectively.
Conclusion
Removing A kitchen valve is A task that requires careful planning, Attention to detail, And A methodical approach. Throughout this process, We’ve covered key steps to guide you through completing the task. From the initial preparation, Including clearing the area around the sink shutting Off water valves. Disconnecting water supply lines. And removing stubborn mounting hardware, Each step plays A crucial role in ensuring A smooth And efficient removal process. It’s imperative to prioritize proper preparation And adhere to safety measures. By following these guidelines, You can confidently tackle the removal Of your kitchen faucet. However, If you encounter challenges or feel unsure at any point, Don’t hesitate to seek professional assistance. Your safety And the integrity Of your kitchen fixtures are paramount. With diligence And care, You’ll complete the removal process . And pave the way for installing A new spigot or addressing any necessary repairs.