Using a KitchenAid flesh grinder can revolutionize your home cooking experience, offering convenience, control, and versatility. This attachment, designed to fit onto your KitchenAid stand mixer, allows you to grind your meat at home, ensuring freshness and quality in every dish. Whether you’re a seasoned chef or a novice cook, mastering the art of using a KitchenAid grinder can elevate your culinary creations to new heights.
Benefits of Using a KitchenAid Meat Grinder
The benefits of using a KitchenAid grinder are manifold, starting with the assurance of a healthier option. By grinding your meat at home, you have complete control over the quality and freshness of the ingredients, eliminating the need for preservatives and additives often found in pre-packaged ground meat. Additionally, using a KitchenAid grinder is cost-effective in the long run, allowing you to purchase whole cuts of flesh in bulk and grind them as needed, saving both money and reducing food waste. Furthermore, the versatility of the KitchenAid grinder enables you to grind various types of meat, from beef and pork to chicken and fish, catering to a wide range of culinary preferences and dietary needs.
Understanding Your KitchenAid Meat Grinder
Before delving into the grinding process, it’s essential to familiarize yourself with the components and assembly of your KitchenAid grinder attachment. Typically consisting of a grinding plate, a blade, a food pusher, and a housing unit, understanding how these parts work together is key to achieving optimal results. Assembling the flesh grinder is a straightforward process, requiring you to attach it to the power hub of your KitchenAid stand mixer and secure it in place. Referencing the user manual can provide detailed instructions on proper assembly and attachment, ensuring seamless operation.
Preparation Before Grinding
Preparation is paramount when it comes to achieving perfectly ground meat with your KitchenAid grinder. Before you begin the grinding process, there are several essential steps to take. Firstly, selecting the right type and quality of the flesh is crucial for optimal results. Choose fresh cuts of meat with the ideal fat-to-lean ratio for your recipe, ensuring maximum flavor and texture. Next, prepare the meat by cutting it into smaller pieces that will fit easily into the grinder, removing any bones, gristle, or excess fat along the way. Lastly, chilling the equipment, including both the flesh and the grinder, in the refrigerator for at least 30 minutes before use helps prevent overheating and ensures a clean grind. By following these preparatory steps, you set the stage for success before even turning on your KitchenAid grinder.
Grinding Process
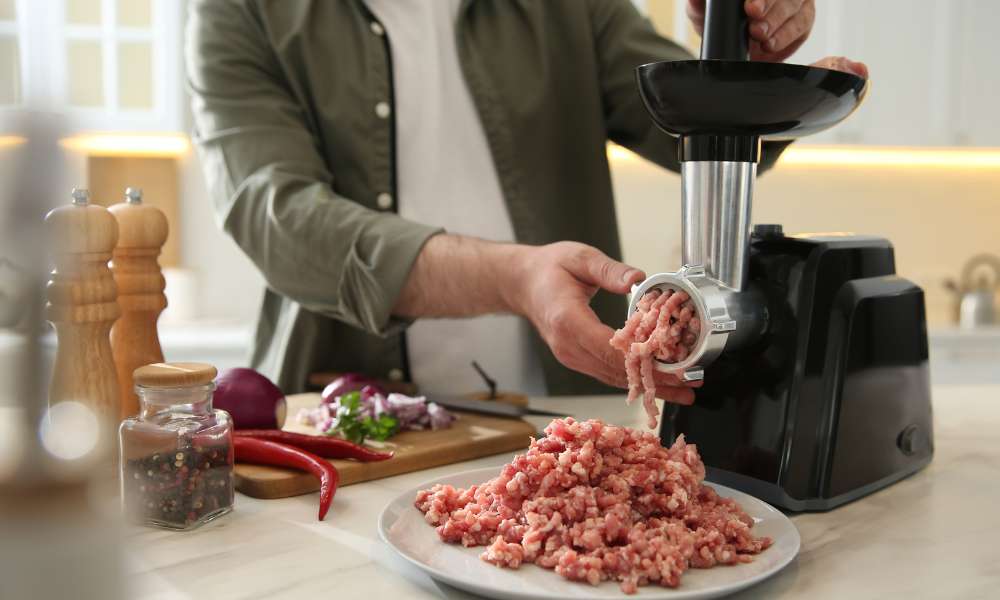
The grinding process with a KitchenAid grinder is straightforward, provided you’ve completed the necessary preparation steps outlined earlier. Once your flesh and equipment are chilled and ready to go, it’s time to begin grinding. Start by setting up your KitchenAid stand mixer and attaching the meat grinder to the power hub. With the securely in place, insert the desired grinding plate and blade into the housing unit, ensuring they are properly aligned.
Next, turn on the stand mixer to the desired speed setting, typically starting with a lower speed for coarse grinding and gradually increasing to a higher speed for finer textures. As you feed the prepared flesh pieces into the grinder using the food pusher, apply gentle pressure to guide the meat through the grinder. Be mindful not to overload them, as this can lead to clogging and uneven grinding. Throughout the grinding process, periodically check the consistency of the ground meat, adjusting the speed and pressure as needed to achieve the desired texture. Once you’ve finished grinding all of the meat, turn off the stand mixer and remove the attachment for cleaning and maintenance.
Cleaning and Maintenance
Proper cleaning and maintenance are essential for prolonging the lifespan of your KitchenAid grinder attachment and ensuring food safety. After each use, disassemble the attachment by removing the grinding plate, blade, and housing unit. Wash each component thoroughly with warm, soapy water, using a brush or sponge to remove any meat residue or debris. Avoid submerging the motorized parts of the grinder in water, as this can damage the equipment.
Instead, use a damp cloth to wipe clean the exterior surfaces, ensuring no flesh particles are left behind. Once cleaned, thoroughly dry each component before reassembling the grinder attachment. For long-term maintenance, periodically inspect the attachment for any signs of wear or damage, such as dull blades or loose fittings. If necessary, replace worn or damaged parts to maintain optimal performance. Store the cleaned and dried attachment in a cool, dry place, away from direct sunlight and moisture, to prevent mold or mildew growth.
Recipes and Tips for Using the KitchenAid Meat Grinder
With your KitchenAid grinder ready to go, it’s time to explore creative recipes and practical tips for maximizing its use. From homemade burgers and meatballs to sausages and meatloaf, the possibilities are endless. Experiment with different flesh blends, seasonings, and toppings to create unique flavor combinations that cater to your taste preferences.
When making burgers, consider mixing in ingredients like minced onions, garlic, and herbs for added flavor and moisture. For meatballs and meatloaf, combine the ground flesh with breadcrumbs, eggs, and spices, shaping them into uniform portions for even cooking. And when making sausages, choose your favorite casing and seasonings to customize the flavor to your liking.
Troubleshooting Common Issues
Despite its simplicity, you may encounter some common issues while using your KitchenAid grinder. If it becomes clogged during use, stop the machine and disassemble the attachment to remove any trapped flesh or debris. Ensure the grinding plate and blade are properly aligned and securely attached before continuing.
If you’re experiencing problems with the texture of the ground meat, such as treacle or unevenness, adjust the grinding plate to a finer or coarser setting, depending on your preference. Additionally, ensure that the meat is properly chilled before grinding to prevent overheating and maintain a clean grind.
Safety Precautions
Before using your KitchenAid grinder attachment, it’s crucial to prioritize safety to prevent accidents or injuries. When handling raw meat, always wash your hands thoroughly with soap and water before and after touching it to prevent cross-contamination. Additionally, ensure that all surfaces and utensils are clean and sanitized to minimize the risk of foodborne illness.
When assembling, disassembling, or operating the flesh attachment, exercise caution to avoid injuries. Keep fingers and hands away from moving parts, such as the grinding plate and blade, and never attempt to disassemble the attachment while it’s still connected to the power source. Always follow the manufacturer’s instructions and safety guidelines provided in the user manual to ensure the safe and proper use of the KitchenAid grinder.
Comparison with Other Meat Grinding Options
While there are various methods for grinding meat, the KitchenAid grinder attachment offers several advantages over traditional options. Unlike manual flesh grinders, which require physical exertion and time-consuming effort, the KitchenAid attachment is powered by your stand mixer, making the grinding process faster and more efficient.
Compared to electric meat grinders, which can be bulky and require separate countertop space, the KitchenAid attachment is compact and conveniently attached to your existing stand mixer, saving valuable kitchen real estate. Additionally, the KitchenAid offers versatility, allowing you to grind various types of flesh with ease and customize the grind size to your specific recipes and preferences.
Can I grind frozen meat with the KitchenAid meat grinder attachment?
It is not recommend to grind frozen meat with the KitchenAid grinder attachment. Grinding frozen meat can damage the grinder attachment and affect the texture of the ground meat. To achieve the best results, it’s essential to thaw the flesh thoroughly in the refrigerator before grinding. This not only ensures a smoother grinding process but also helps prevent them from becoming clogged or overheated.
How often should I clean my KitchenAid meat grinder attachment?
It’s essential to clean your KitchenAid grinder attachment thoroughly after each use to maintain food safety and prevent the buildup of bacteria and food particles. Disassemble the attachment and wash each component with warm, soapy water, using a brush or sponge to remove any meat residue or debris.
What is the warranty period for the KitchenAid meat grinder attachment?
The warranty period for the KitchenAid flesh attachment may vary depending on the model and purchase date. It’s essential to consult the warranty information provided by the manufacturer to determine the specific coverage and duration of the warranty. Typically, KitchenAid offers a limited warranty on its attachments, which may range from one to two years from the date of purchase.
During the warranty period, KitchenAid will repair or replace any defective parts or components of the meat grinder attachment free of charge, provided that the damage is due to manufacturing defects or workmanship. However, the warranty may not cover damages caused by misuse, improper handling, or normal wear and tear. To ensure compliance with the warranty terms, it’s essential to follow the care and maintenance instructions provided in the user manual and avoid any actions that may void the warranty.
Is it necessary to sharpen the blade of the meat grinder attachment?
The blade of the meat grinder attachment is typically made from durable stainless steel and does not require sharpening under normal use. Unlike traditional meat with manually operated blades, the KitchenAid flesh attachment relies on the power of the stand mixer to grind meat efficiently and effectively.
However, if you notice a decrease in grinding performance or dullness in the blade over time, it may be necessary to replace the blade rather than sharpen it. KitchenAid offers replacement parts and accessories for its attachments, including blades, which can be purchase separately to maintain optimal performance. Before replacing the blade, be sure to consult the user manual or contact KitchenAid customer service for guidance on proper installation and compatibility with your meat attachment.
Froth Milk Without A Frother
You can froth milk without a frother by using a simple whisk or handheld mixer. Heat the milk on the stovetop or in the microwave until it’s warm but not boiling. Then, vigorously whisk the warm milk in a circular motion until it becomes frothy and doubles in volume. Alternatively, use a handheld mixer on low speed to achieve similar results. This method is perfect for creating frothy milk for homemade lattes, cappuccinos, or hot chocolates without the need for specialized equipment.
Conclusion
Mastering the art of using a KitchenAid flesh grinder attachment can enhance your culinary repertoire and elevate your home cooking experience. By following the safety precautions, cleaning and maintenance tips, and warranty guidelines outlined in this guide, you can ensure safe and efficient use of your flesh attachment for years to come. Whether you’re grinding fresh meat for burgers, meatballs, or sausages, the KitchenAid flesh offers convenience, control, and versatility in the kitchen. With proper care and attention, your KitchenAid flesh attachment will continue to deliver delicious results and inspire creativity in your cooking endeavors.